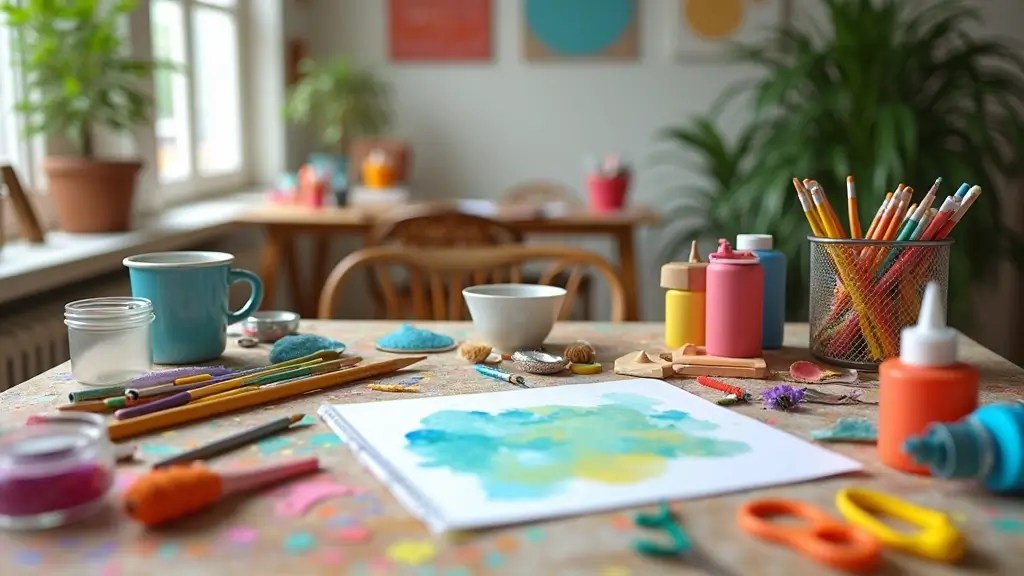
This season has me craving home decor that is quick, cozy, and doable with kids. I wanted ideas that bring personality to a room without big price tags or a giant mess. So I put together 30 DIY home decor projects that are easy enough for kids to handle. You can finish many in an afternoon and still love them weeks later.
If you love simple crafts, budget decorating, and kid friendly projects, this one is for you. It’s built for parents, roommates, teachers, and anyone who wants a home that feels warm, not store bought. You care about safety, quick cleanups, and steps you can actually follow.
Inside, you’ll find 30 ideas that cover wall art, cozy textiles, planters, and small shelves. Each idea comes with simple steps, a short materials list, and tips to keep mess to a minimum. They use common supplies like paint, fabric, jars, and twine. And yes, project number 12 is a crowd-pleaser that makes a big impact with just a few scraps.
Here is how to use it: pick one idea, set up a tiny craft space, gather basics, and dive in. Doing it this way keeps things small, doable, and fun for everyone.
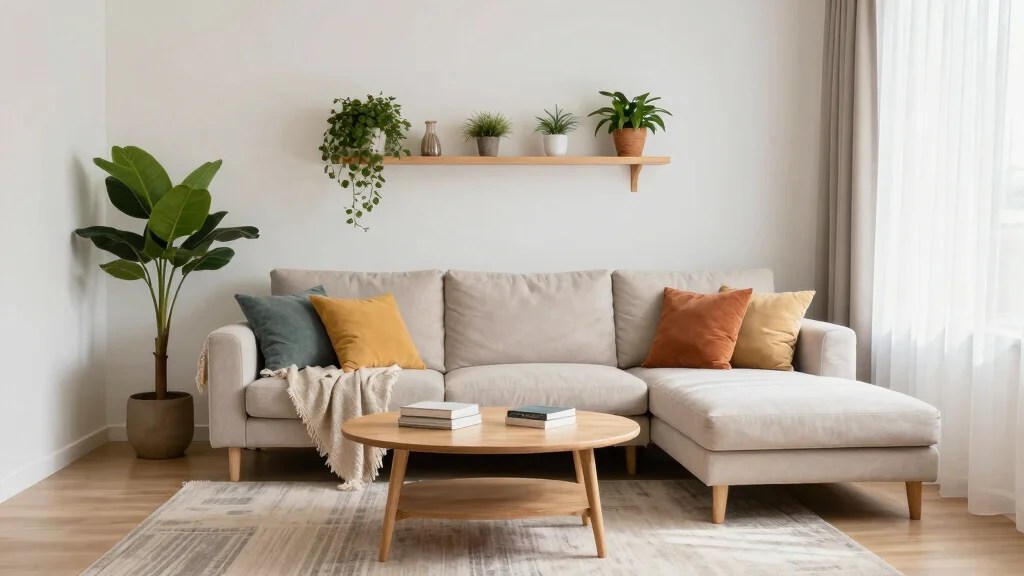
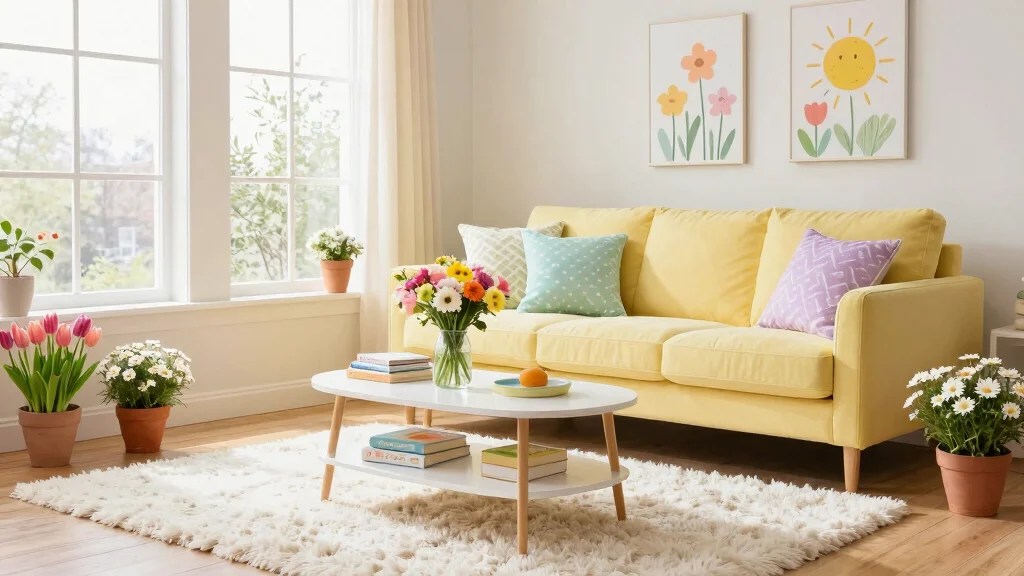
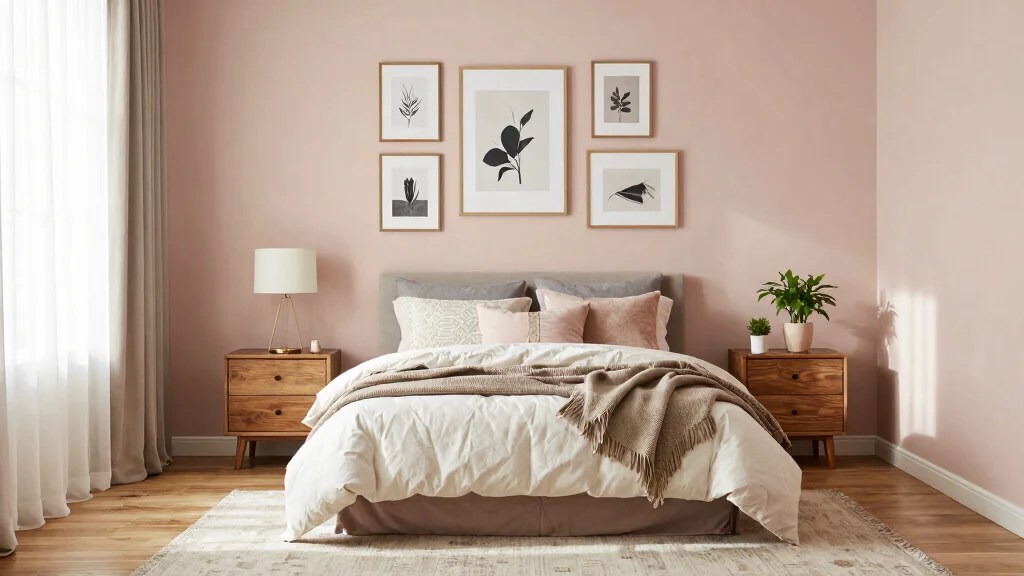
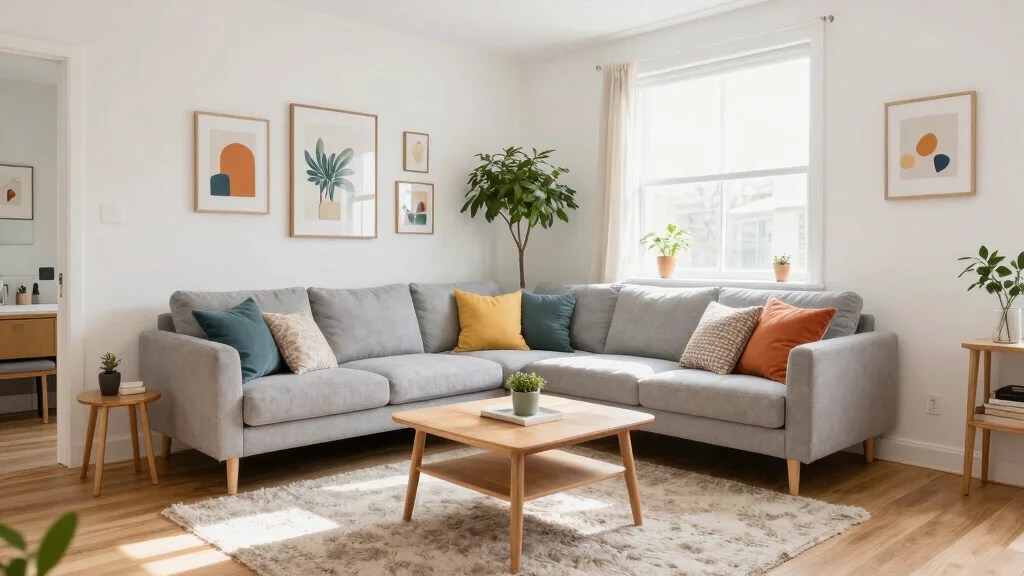
These projects bring a modern, warm vibe to every room. They lean on natural textures, upcycled bits, and soft color palettes that fit living rooms, bedrooms, or a kid’s corner.
Ready to start? Grab a tray of supplies, choose your first project, and set a kid friendly work area. If you try any ideas, drop photos in the comments or tag us.
Contents
- 1. Painted Mason Jar Vases
- 2. DIY Photo Frames from Cardboard
- 3. Craft Stick Wall Art
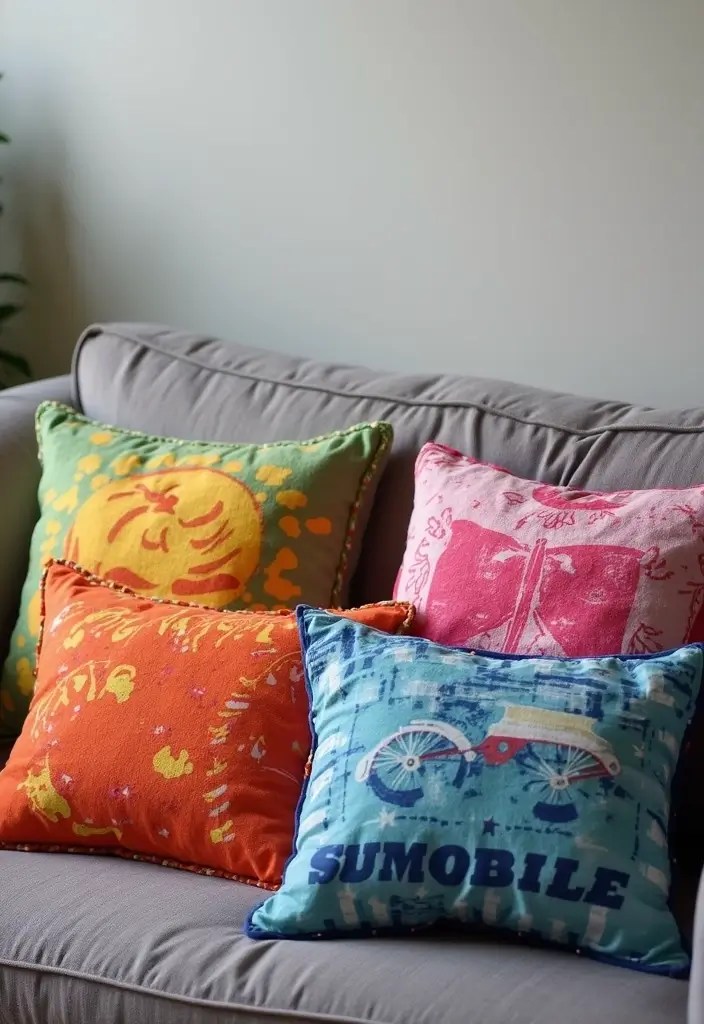
- 4. Upcycled T-shirt Pillows
- 5. Glittery Flower Pots
- 6. Paper Plate Wall Hanging
- 7. Beaded Keychains
- 8. DIY Clothespin Magnets
- 9. Decorative Candle Holders
- 10. DIY Wall Art from Old Magazines
- 11. Yarn-Wrapped Letters
- 12. Painted Rock Animals
- 13. Colorful Wind Chimes
- 14. Fabric Scrap Bunting
- 15. Playful Painted Rocks for Garden
- 16. Paper Mache Bowls
- 17. Recycled Crayon Art
- 18. DIY Pom-Pom Garland
- 19. Woven Wall Hanging
- 20. Painted Furniture
- 21. DIY Terrariums
- 22. DIY Bookmarks
- 23. DIY Coasters
- 24. Upcycled Glass Jars
- 25. Handmade Greeting Cards
- 26. DIY Clipboards
- 27. DIY Flower Crowns
- 28. DIY Stamped Fabric Bags
- 29. DIY Nature Prints
- 30. DIY Memory Jars
1. Painted Mason Jar Vases

You want a quick, kid-friendly project that brightens your home. Painted Mason Jar Vases do that and more. They’re easy, inexpensive, and great for learning color and care. Here is why this works: kids get hands-on art, adults get simple decor they can display.
What you need
– Clean mason jars with lids off
– Acrylic paints in your favorite colors
– Paint brushes and a protective work surface
– Newspaper or a washable mat
– Clear sealant to protect the paint
– Flowers, twigs, or small decorative items for filling
Let’s break it down
– Wash jars well and remove any sticky labels. Let them dry fully.
– Set up a painting station with newspaper. Put on old clothes or a smear guard.
– Let kids paint. They can make stripes, dots, swirls, or solid blocks. Encourage them to mix colors.
– Let the jars dry, then add a clear sealant. This makes the art last and keeps it easy to wipe clean.
– Fill the vases with fresh flowers, graceful twigs, or even colorful candies for a playful look.
Next steps: place them on your table, shelf, or windowsill. Change the colors with the season. You’ve got a simple craft that adds charm and teaches a bit about nature through how you arrange flowers and greenery.
Product Recommendations:
2. DIY Photo Frames from Cardboard

Here is a kid-friendly way to turn old cardboard into a keepsake frame.
What you need
– Cardboard scraps
– Scissors or a kid-safe craft knife (adult supervision)
– Glue or tape
– Paint, markers, stickers, or washi tape
– Extra cardboard for the back stand
– A photo to show
Steps to make your frame
– Pick a shape you like. Try a heart, star, or a simple rectangle.
– Cut the frame. Cut around the shape to make a border, then cut out a window for the photo.
– Decorate. Let your kids paint, doodle, and add stickers or tape.
– Add a stand. Glue a strip of cardboard to the back so the frame can stand on a table.
– Insert the photo. Place the photo behind the front window and secure with a little tape.
Tips
– Sign the back with a name and date so the memory stays with you.
– Use a light coat of glue on glitter or paint to help it stay.
Next steps: Build a mini gallery on a wall or give a few frames as simple gifts to family. Recycled cardboard saves money and teaches kids to reuse materials.
Product Recommendations:
• Cardboard Craft Supplies Kit
3. Craft Stick Wall Art

Want a simple, kid-friendly wall art project that actually looks great? Craft sticks fit the bill. They’re cheap, colorful, and forgiving if a stick bends or the glue slips. Your child can plan, place, and press to make patterns, shapes, or even letters. Here is why this project works and how to do it.
– Materials
– Colored craft sticks
– White glue
– Scissors
– A blank canvas or sturdy cardboard
– Optional paints, markers, or a clear sealant
– Instructions
– Start with a clean, flat surface.
– Let kids test designs by laying sticks on the board first.
– When they love a layout, glue sticks down one by one and press firmly.
– For a background, paint first or leave the natural wood for a rustic look.
– Variations
– Create letters, simple shapes, or a tiny scene like a mountain or sun.
– Build stripes by using two colors per row.
– Add texture with small beads or pom-poms for extra pop.
– Finishing and hanging
– Let the glue dry for at least 30 minutes.
– If adults want, apply a light spray sealant after dry time.
– Hang with removable mounting putty or a small picture hook.
– Tips
– Pick a color theme that fits the room.
– Keep designs simple for younger kids.
– Use a frame or mat to give the piece a polished look.
Next steps: show off the finished art in a hallway, bedroom, or playroom. These craft stick wall pieces add color and curiosity without a big mess or mess of supplies.
Product Recommendations:
4. Upcycled T-shirt Pillows
Here is a kid-friendly way to turn old shirts into soft décor.
Why this helps you: you reuse clothes, learn simple sewing, and make rooms feel personal with bright colors and favorite designs. You end up with a cozy pillow and a memory tied to the shirt.
What you need
– Old T-shirts you love
– Scissors
– Needle and thread or a sewing machine
– Stuffing or fabric scraps
– Optional: fabric markers for a quick print
Steps
– Lay a shirt flat and cut it into two panels, front and back, keeping each panel intact.
– Place the two pieces together, inside out, and sew around the edges, leaving a small opening.
– Turn the pillow right side out through the opening and gently push the corners flat.
– Stuff with pillow stuffing or scraps until it feels full but soft.
– Sew the opening shut with small, invisible stitches.
Next steps: make a small set in different colors, or add decorative stitches to show off style. These pillows brighten a bed or chair and keep a memory of a favorite shirt. Care tips: wash on gentle, air dry to keep colors bright. If a panel shows wear, patch it with a tiny scrap to extend life.
Product Recommendations:
5. Glittery Flower Pots
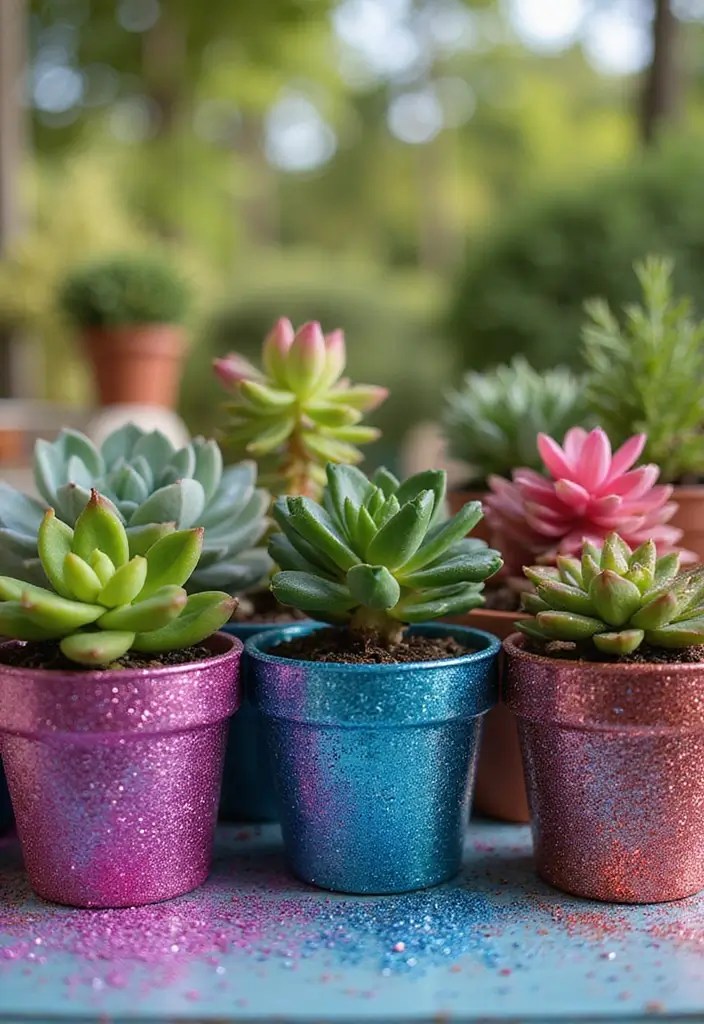
Want a brighter plant shelf? Glitter pots are quick, kid friendly, and fun to make. They add color without a big mess, and you can swap colors with the season.
Here is why this works
Terracotta grabs glue well, so the glitter sticks. The shine makes plain pots look special. A clear sealant locks the glitter in place, cutting down fallout when you water or wipe them.
Steps to make glittery pots:
– Gather plain terracotta pots, non toxic craft glue, fine glitter, and a clear sealant (spray or brush on).
– Clean the outside of each pot and let it dry.
– Brush a thin layer of glue on the outside.
– Sprinkle glitter over the glue and press gently.
– Let it dry, then apply the sealant. Allow it to cure fully.
– For patterns, tape off stripes or dots before you glitter.
Design ideas
Use two or three colors for a playful look. Try polka dots, stripes, or swirls. You can write tiny names or seed words with a fine brush.
Fill and enjoy
Place flowers, herbs, or succulents in the pots. Set them on a sunny sill or table. A little shedding may happen, so seal well and handle with care.
Next steps
Let the pots dry completely before watering nearby plants and keep them indoors for best shine.
@media (max-width: 600px) {
.visual-quiz-iframe { min-height: 995px !important; height: 1100px !important; }
}
Product Recommendations:
6. Paper Plate Wall Hanging
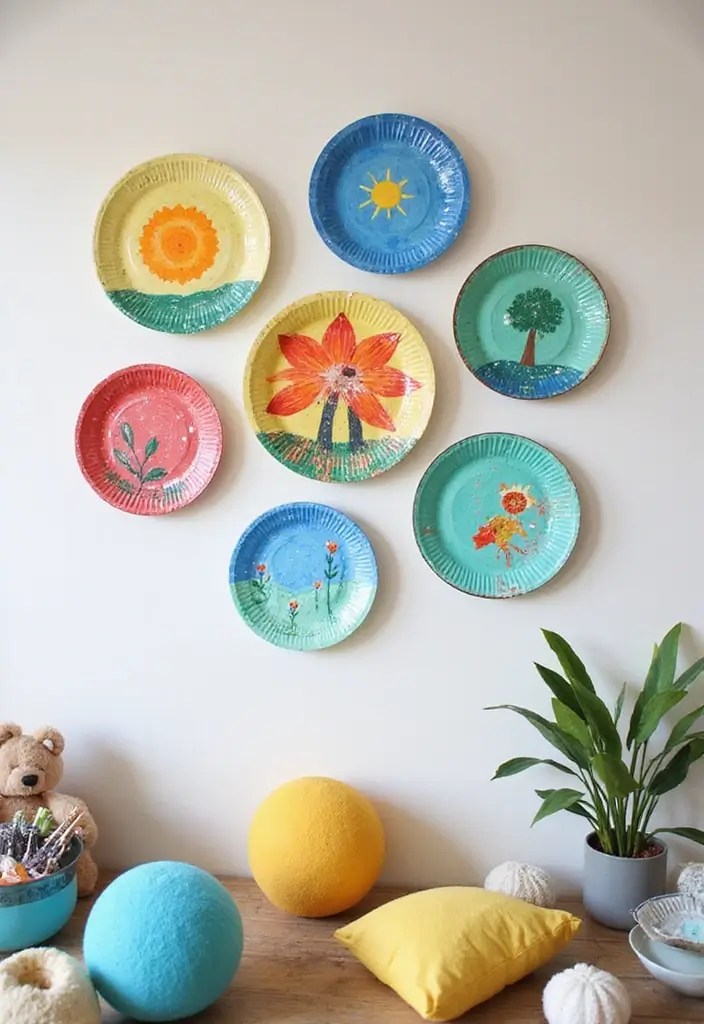
Looking for quick, kid‑friendly wall decor that adds color and life to a room? Paper plate wall hangings fit the job. They’re simple, affordable, and a proud, tangible reminder of your child’s creativity. Here is why this craft works: it builds planning, color play, and a sense of achievement with almost no mess.
Materials
– Plain paper plates
– Washable paints
– Small brushes or sponges
– String or yarn
– Scissors
– Hole punch
– Optional: stamps, markers, stencils for extra patterns
Steps
1) Start with clean, plain plates.
2) Let your child pick colors and paint the plates with patterns, animals, or abstract designs.
3) Allow the plates to dry completely.
4) Punch a hole near the top edge of each plate.
5) Thread string through the holes and tie knots to secure.
6) Create a display by lining plates in a row, clustering them, or making a sunburst layout.
7) Hang on a wall in a bedroom, play area, or hallway.
Here is why you’ll love this project. It’s flexible and easy to adjust for age. Bigger kids can add many plates, smaller ones can focus on a single plate with bold shapes. You can mix sizes for visual interest. You can also add names or initials to personalize each piece.
Tips
– Use different plate sizes for variety.
– Layer plates slightly for a light 3D effect.
– Try stamps or sponges for quick textures.
– Finish with a light spray of clear sealant if you want easier dusting.
If you’re wondering how many plates to start with, begin with three to five and expand later. This craft stays light, cheerful, and easy to store when you’re done.
Product Recommendations:
7. Beaded Keychains
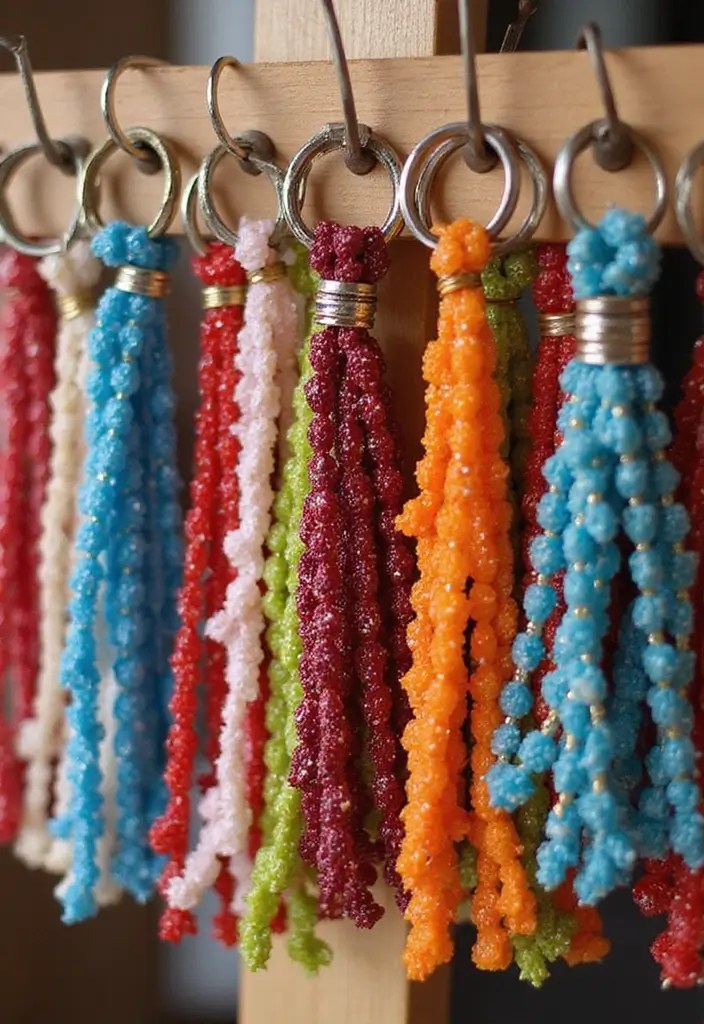
Beaded keychains are a simple way to turn small beads into useful art. You get to pick colors you love and make something you will actually use. Kids feel proud when they see their finished charm on a bag or backpack. It also helps little hands stay busy on trips or waits. And you can crack out several in one afternoon with a splash of color.
Materials
– Colorful beads in small shapes
– Sturdy string or wide elastic
– A keyring or metal ring
– Scissors or a small tape to trim ends
Here is how to make them.
Steps
1. Let your child choose colors and bead shapes.
2. Thread beads onto the string to create a simple pattern.
3. Leave a small tail at each end so the knots have space.
4. Tie a tight knot, then double knot for extra security.
5. Loop the string through the keyring and pull tight. Trim any excess.
This project helps fine motor skills and sparks creativity. It also leaves a handy keepsake that your child can use every day.
Tips
– Pick a pattern that is easy: stripes, hearts, or a smiley face.
– Use a shallow tray to keep beads from rolling away.
Next steps: Try different bead sizes, or add letter beads to spell a name. This small craft is a great way to start beading and can grow with your kid.
Product Recommendations:
8. DIY Clothespin Magnets

Want a quick, kid-friendly craft that makes your fridge look cheery and tidy? DIY clothespin magnets fit the bill. They’re cheap, easy, and finish fast. You get a small space to show off art and notes.
What you need
– Clothespins (wooden works best)
– Small round magnets
– Acrylic paint or markers
– Clear sealant (optional)
– Glue or hot glue (adult supervision)
– A bit of imagination for designs
Steps to make
– Gather clothespins and magnets.
– Let the kids pick colors and paint the pins in bright designs.
– Set them aside to dry completely.
– Glue a magnet to one end of each clothespin.
– Press the magnet to a fridge or magnetic board and hold for a minute.
– Add a simple drawing or sticker before painting if you like.
Why this works
Kids stay engaged. They see a result fast. The magnets hold photos, notes, or school art. They brighten a plain fridge and give young artists pride.
Tips for best results
– Seal the paint so it lasts through daily use.
– Use stronger magnets if you plan to hold heavier items.
– Create a set of colors or patterns for a playful group.
Next steps: line up a few sets and use them for birthday notes or chore charts.
Product Recommendations:
9. Decorative Candle Holders

Want a warm glow at home without big costs or fuss? Decorative candle holders from jars give style and soft light. This kid-friendly DIY turns simple glass into cozy decor.
What you’ll need
– Clean jars or reused glass containers
– Paints or decorative tape
– Sand or small pebbles for the bottom
– Tealight candles (or safe LED tealights for safety)
Here is how to make them
– Let the kids paint the outside of the jars. They can do stripes, dots, or tiny scenes.
– Or wrap the jars with decorative tape for a quick color pop.
– Pour a thin layer of sand or pebbles in the bottom for stability.
– Place a tealight inside. If you use real candles, keep them away from the paint and tape. LED tealights are a safe option for younger kids.
Why it works
– The light is soft and welcoming.
– Kids learn about color, texture, and how light fills a space.
– It’s a simple project with a big family payoff.
– It’s quick, inexpensive, and easy to repeat for friends.
Ways to use them
– Set them on the dining table, a shelf, or a windowsill.
– Group three jars of different sizes on a tray for a focal point.
– Try seasonal colors or add a glitter speck for a festive touch.
Product Recommendations:
10. DIY Wall Art from Old Magazines
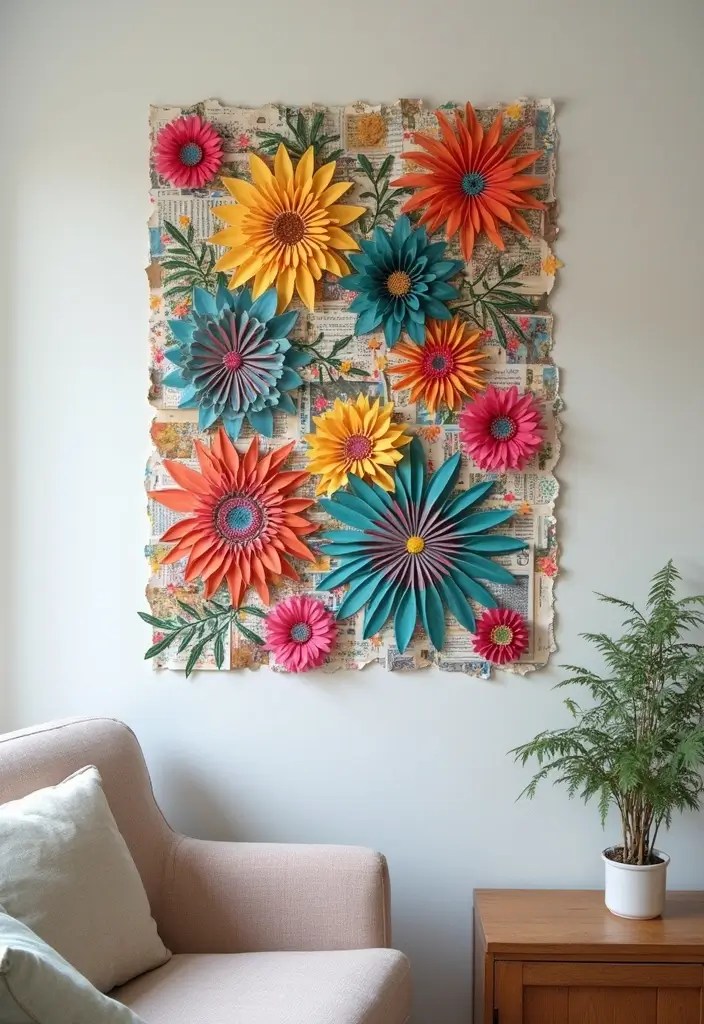
Feeling stuck with old magazines? Turn them into fresh wall art that kids can help make. It’s thrifty, easy, and shows off a little personality in your space.
Here is why it works: small pieces let kids pick what they love. You get a one-of-a-kind piece you won’t see anywhere else.
– Gather supplies: a large canvas or sturdy board, old magazines, scissors, adhesive, and a sealant or Mod Podge.
– Let kids choose images, letters, and color blocks that speak to them.
– Cut out bits and lay them out on the board first. Move pieces until the look feels right.
– Glue the pieces down. Press gently to flatten corners.
– Let it dry completely. Apply a sealant to keep colors from fading.
This project can hang in a kid’s room, a cozy corner, or be a thoughtful gift for family members. Want a twist? Try a themed collage, a grayscale look, or a word-art piece using big letters.
Next steps: photograph the finished art and swap pieces later to refresh the display. Easy, eco-friendly, and totally personal.
Product Recommendations:
11. Yarn-Wrapped Letters
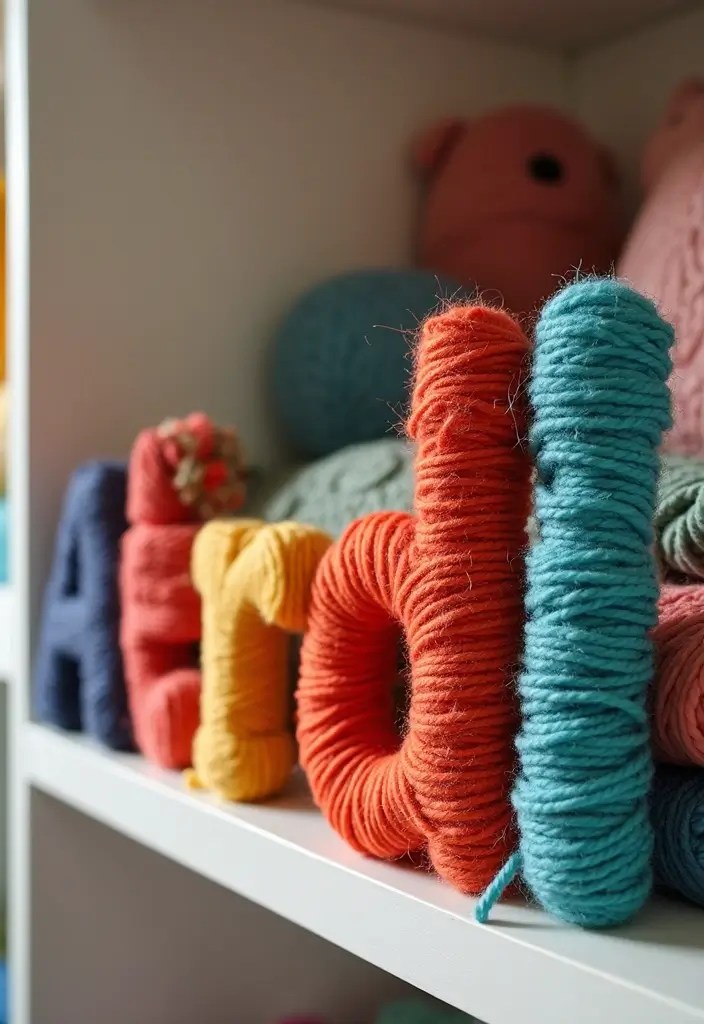
Yarn wrapped letters are a kid friendly project that adds color and warmth to any room. You pick the colors, and your finished sign helps a wall feel personal. It’s quick, easy, and you can reuse cardboard from a past craft. It also helps kids learn color matching and pattern ideas. You guide the look from start to finish.
What you need
– Thick cardboard letters or cut-out letters
– Colorful yarn in a few shades
– Tape or craft glue
– Scissors
– Optional: hot glue for extra hold
How to make yarn-wrapped letters
1) Pick a word or initials that fit the space.
2) If the cardboard edges look rough, trim them clean.
3) Start at the back. Secure the yarn end with tape or a dab of glue.
4) Wrap with even twists. Keep the strand close to each wrap so the letters look smooth.
5) Switch colors to create stripes or a bold pattern.
6) When you finish, secure the end on the back with tape or glue and trim any extra yarn.
Tips for a neat finish
– Pull the yarn with steady tension. Too loose looks sloppy.
– Fill gaps with a few extra turns.
– Try different textures, like metallic or fuzzy yarn.
– A light dab of glue on the back helps keep the yarn in place.
Display ideas
– Hang the letters on a wall with string.
– Stand them on a shelf as a name sign.
– Layer several colors for a bright, modern look.
– Add a small frame or a photo above the letters to boost the decor.
Product Recommendations:
12. Painted Rock Animals

Looking for a simple, kid-friendly outdoor craft? Painted rock animals are a fun way to mix art with nature. They turn plain stones into friendly creatures you can see and touch.
Here is why they work: clear steps, safe materials, and a little room for imagination. Let’s break it down.
– Gather rocks from your garden or a local park. Make sure collecting is allowed where you live.
– Clean the rocks to get rid of dirt. A quick wash with soap and water helps.
– Let kids paint with non-toxic paints. Bright acrylics work well on rocks.
– When the paint dries, seal the art with a clear coat. This keeps colors bright and protects the finish.
Show off the finished animals in the garden, use them as paperweights, or wrap one as a small gift. You can create cats, dogs, birds, or imaginary creatures. The activity helps kids observe nature and use color and texture.
Tips for better rocks: pick smooth, flat rocks for easier painting. Sketch a simple design first. Use bold lines and big color blocks for young painters. Work in a well-ventilated area when applying sealant.
Next steps : involve siblings, set a theme, or start a painted rock trail in your yard. Simple joy, big smiles.@media (max-width: 768px) { .internal-links-flex { flex-direction: column !important; } .internal-links-flex > div { flex: none !important; } }
You might also like


Product Recommendations:
13. Colorful Wind Chimes
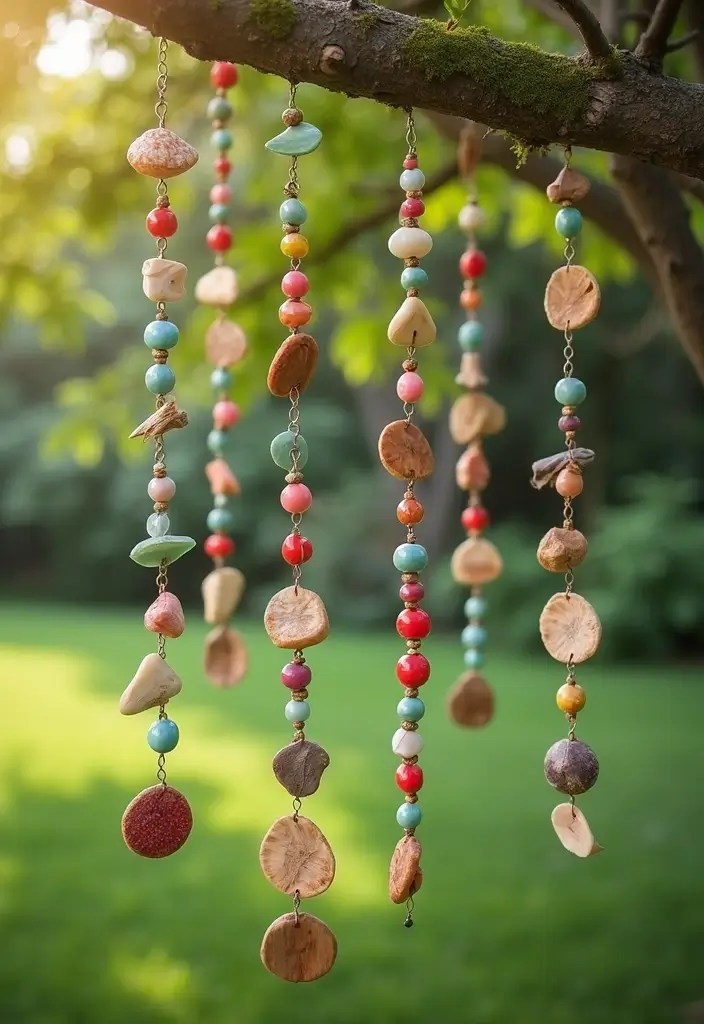
You want a quick, kid friendly project that adds color and music to your yard.
What you’ll need
– Strings or thin wire
– Beads, shells, bells, or small metal pieces
– A sturdy base such as a strong branch or thick cardboard circle
– Scissors, tape, glue
– Optional paints or colored thread for extra color
How to make colorful wind chimes
– Pick a base. A branch that feels solid works well.
– Prepare the base. If you use cardboard, cut it to a circle or square and make a hole in the center.
– Cut several long strings. Tie a knot at one end of each string.
– Add items to each string. Space items so they hang at different heights.
– Attach the other end to the base. Keep knots tight.
– Bring color to life. Paint beads, wrap strings in bright colors, or mix bold pieces for a rainbow look.
Hang and enjoy
– Find a sunny, breezy spot like a porch or fence. Space lets every chime ring.
– In wind, they produce a gentle sound. If the tone is off, swap lengths.
Tips for families
– Let kids pick colors and items. It teaches balance and creativity.
Hang it up and listen to the garden sing.
Best of all, it grows with you. Swap colors, add tiny bells, and make a new tune each season.
Product Recommendations:
14. Fabric Scrap Bunting

Here is why fabric scrap bunting makes decorating easy. It adds color and texture. It turns old fabric into something bright. This project invites kids to help and keeps craft mess small.
What you need
– Fabric scraps in different colors and patterns
– A long string or twine
– Scissors and a safe glue or simple knot technique
How to make it
– Cut scraps into triangles or flag shapes.
– Lay them along the string to plan a fun sequence.
– For a kid-friendly finish, have them tie each piece on with a simple knot, or dab a touch of glue to secure only the ends.
– Leave some space between pieces so colors show.
Tips and ideas
– Pick bold colors for party vibes, or soft tones for a cozy nook.
– Mix large and small pieces for a dynamic look.
– Measure the length by the wall or curtain space you want to brighten.
– If you wash it later, choose fabrics that hold up to light washing or rely on knots instead of glue.
Where to put it
– Drape above a bed, desk, or reading chair.
– Use it for birthdays, sleepovers, or seasonal displays.
– Create mini garlands on jars, planters, or shelves.
Next steps: start with a short strand, test the glue, and then expand as you see colors come together.
Transforming fabric scraps into bunting not only brightens your space but also invites creativity into your home. Let the kids help—because the best decor projects are the ones filled with laughter and teamwork!
Product Recommendations:
15. Playful Painted Rocks for Garden
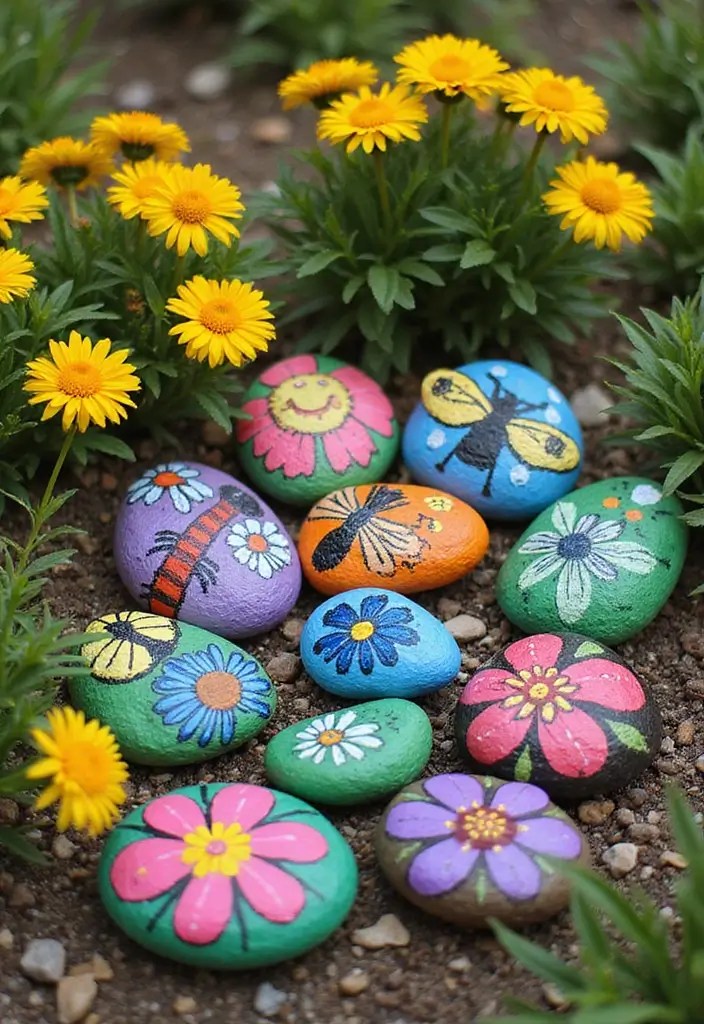
Want a quick, kid-friendly way to color your garden? Painted rocks do the job fast. They invite imagination and stand up to sun and rain.
What you’ll need
– Smooth rocks
– Outdoor acrylic paints
– Small brushes
– Paper towels and a water cup
– Clear sealant spray
Easy steps
1) Gather rocks that feel smooth in your hand.
2) Wash them and let them dry completely.
3) Lay out a simple painting area with a drop cloth.
4) Pick a design: flowers, beetles, smiling suns, or your favorite cartoon character.
5) Let kids paint with bold colors. Keep strokes clear and simple.
6) Allow the paint to dry, then spray on a clear sealer. Do this outside if you can.
Tips for lasting color
– Use outdoor acrylics for weather resistance.
– Apply the sealant in a well-ventilated area.
– Re-apply sealant after a season if needed.
Ways to use painted rocks
– Mark plant beds or paths with cute garden markers
– Create a playful rock border along a walkway
– Leave small scenes that spark joy for visitors
Next steps: keep a rock stash ready, set a paint day with the kids, and place finished rocks where neighbors will notice them.
This quick project builds pride and gives your garden a colorful, walkable show.
Product Recommendations:
16. Paper Mache Bowls

Want a quick decor win you can finish with kids today? Paper mache bowls fit that goal. They’re light, practical, and recycle friendly. You get a handmade piece that adds color and texture to shelves, desks, or a kitchen counter. Here is why this DIY project works: it uses cheap supplies and teaches basic crafts you can repeat with different shapes.
Instructions for paper mache bowls:
– Gather supplies: newspaper, balloons, white glue or flour for paste, a little water, and a shallow tray for dipping.
– Inflate a balloon to your desired bowl size. This becomes the mold.
– Tear newspaper into rough 2-inch strips. Smaller pieces for curves work best.
– Mix paste. A flour-and-water paste is simple: whisk until smooth. Or use white glue with a splash of water.
– Dip a strip, shake off the excess, and lay it on the balloon. Repeat to build a few layers.
– Let each layer dry before adding the next. Aim for 3 to 4 sturdy coats.
– When fully dry, pop the balloon and gently remove any stubborn bits. Trim edges with scissors.
– Optionally sand for a smoother rim and paint or seal to finish.
– Use your bowls for keys, coins, nuts, or small fruit. They also work as cute display pieces.
Next steps: try bright colors, metallic paint, or decoupage with scrap paper.
Product Recommendations:
17. Recycled Crayon Art

If you want a quick, kid-friendly craft that uses broken crayons, try recycled crayon art. It turns scraps into wall decor you can be proud of. You help the planet and have fun.
What you need:
– Broken crayons
– A sturdy canvas or thick cardboard
– Masking tape
– A hair dryer on low heat
– Optional: old newspaper to catch drips
Here is why this works. The crayons melt with warm air and run down the surface. Colors blend for a simple, eye-catching effect.
Steps to make crayon art:
1) Line up the crayons at the top edge of the canvas. Tape them in place.
2) Turn on the hair dryer to low. Hold it a few inches away and move it so the wax melts and drips downward.
3) When you like how it looks, stop. Tilt the canvas a bit to steer the flow if you want more drama.
4) Let it cool completely before you move it. Hang it as is or with a frame.
This easy project creates a bright talking point in any room. It shows you can upcycle old supplies into art.
Next steps: try different color sets, or make a rainbow arc pattern. Share your piece with friends and swap tips on color blends.
Turn broken crayons into vibrant masterpieces! With recycled crayon art, you’ll not only unleash creativity but also teach kids the beauty of repurposing – a fun, eco-friendly way to decorate your home.
Product Recommendations:
• Hair Dryer with Low Heat Setting
18. DIY Pom-Pom Garland
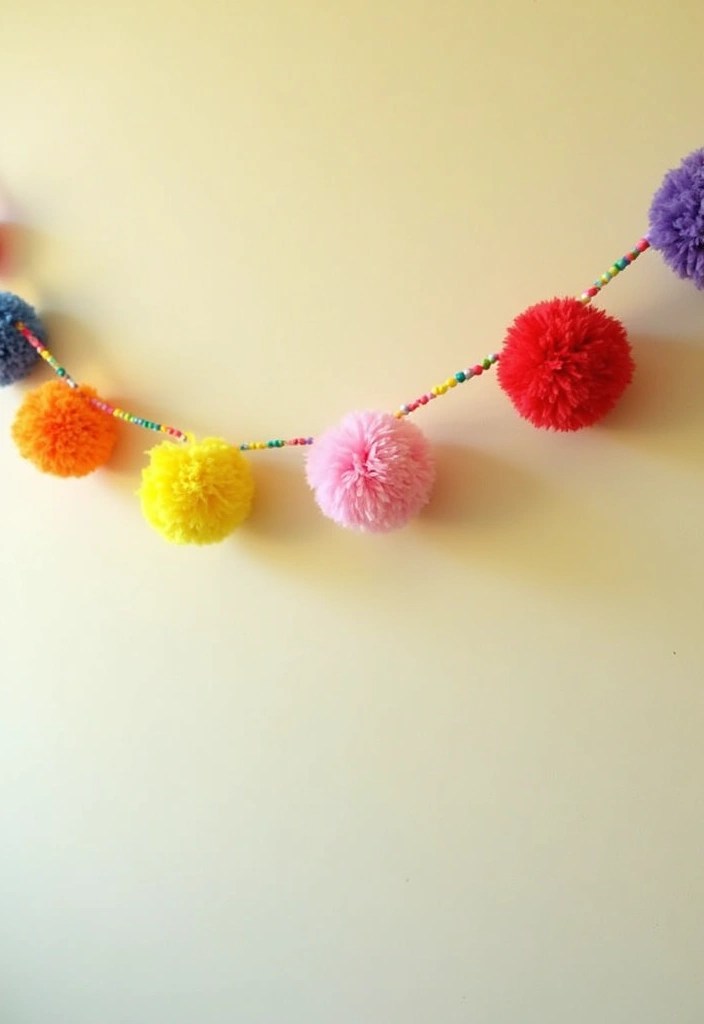
Want a splash of color around the house? A pom-pom garland is a quick, kid-friendly fix. It adds texture in your room.
Here’s how to make a pom-pom garland:
– Gather colorful yarn, scissors, and a sturdy string.
– Let kids wrap yarn around their fingers to form pom-poms.
– When ready, tie the yarn tight and trim the edges for a fluffy look.
– Slide the pom-poms onto a strong thread or twine, spacing them evenly.
– This garland can be hung across walls, mantels, or party backdrops.
– For a fuller effect, use three to five colors and mix sizes.
– Keep a few extra pom-poms on hand for quick decorating boosts.
– When done, give the garland a gentle shake to fluff loose fibers.
– Store in a cool, dry place to avoid frizz before you need it.
Here is why this project shines. It uses common scraps, keeps kids busy, and gives a big look for little work. You can switch colors for seasons or parties.
Materials vary. You can use worsted or chunky yarn, or ribbon.
Choose yarn you already own to save money.
Chunky yarn makes big pom-poms fast, while thin yarn looks delicate.
Ribbon adds a festive touch.
Try different colors and sizes to match your space. It adds joy today too.
@media (max-width: 600px) {
.normal-quiz-iframe { min-height: 570px !important; height: 570px !important; }
}
Product Recommendations:
19. Woven Wall Hanging

If you want a fast, kid-friendly art project that adds color to a wall, try a woven wall hanging. It’s hands-on and you can finish it in one afternoon.
Materials you need
– Yarn in a few colors
– A wooden dowel or sturdy stick
– A simple loom or a cardboard loom you make yourself
– Scissors and tape
Set up the loom
– Create your frame by tying a row of warp threads across the loom. They stay in place like a tiny fence.
– Keep the warp tight enough so the weft will slide easily, then rest the loom on a table or your lap.
Weave your design
– Choose a main color and add stripes with a couple of other colors.
– Weave by going over one warp thread, then under the next, across the width.
– Push gently to keep rows neat, but don’t pull too tight.
– Change colors as you go to build bold patterns your kid loves.
Finish and hang
– When you’re happy, trim the ends and knot them to secure.
– Remove the piece from the loom and attach it to the dowel.
– Hang on a wall with string or a hook. The texture will catch light and draw the eye.
Next steps: try a set of three on a small wall, or add fringe for extra texture. It’s a bright, personal piece that grows with you.
Crafting a woven wall hanging is not just art – it’s a family adventure! Grab some yarn and a stick, and watch creativity bloom in just one afternoon.
Product Recommendations:
20. Painted Furniture
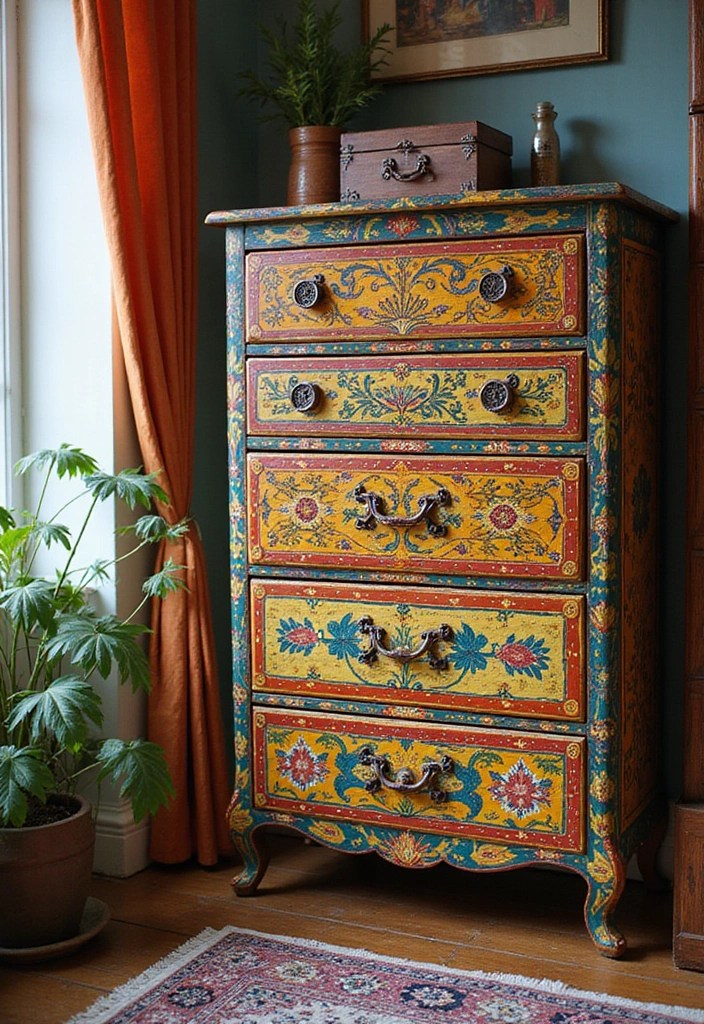
You want to refresh an old piece without spending a lot. Painted furniture can do that, and kids can join in. It brings new life to a room and builds hand skills at the same time.
How to paint furniture
– Choose an old piece such as a chair or table.
– Clean it well with a damp cloth to remove dust and grime.
– Lightly sand the surface so the new paint sticks.
– If the piece is very glossy or dark, apply a primer.
– Let kids paint with non-toxic paint using brushes or sponge daubers.
– Apply thin coats and let each coat dry fully before the next one.
– Lightly sand between coats if you want a smoother finish.
– When all coats are dry, seal the finish with a clear sealant or wax.
– Let them pick colors and patterns.
– Use painter’s tape to create stripes or shapes.
– This project teaches responsibility, from cleaning to tidying up brushes, and it can brighten a room they helped create.
– Set up a clean, well lit workspace with a drop cloth.
– Keep water handy for rinsing brushes and a cloth for wipe ups.
– This simple paint project can change a room fast and give kids pride in a job well done.
Product Recommendations:
• painter’s tape for crisp lines
21. DIY Terrariums

Want a simple project that teaches kids about nature? DIY terrariums are the answer. You can build a mini world inside a glass container and watch it come to life.
Here is why terrariums work for families. They are hands on. They spark curiosity about soil, moisture, plants, and ecosystems. They look great on a shelf or desk. And you can reuse the same container for new ideas as seasons change.
What you need
– A clear glass container or jar
– Pebbles or small stones for drainage
– Potting soil or cactus mix
– Small plants or cuttings (moss, tiny ferns, or fit plants)
– A spray bottle for a gentle mist
– Optional decorations like tiny figurines, shells, or small shells
Steps
– Layer pebbles at the bottom to help water drain away.
– Add soil to cover the pebbles, leaving room for roots.
– Place small plants into the soil and tuck them in gently.
– Press soil lightly around the roots so each plant stands steady.
– Mist lightly and add any fun decorations.
Care tips
– Put your terrarium in bright, indirect light.
– Water sparingly; use the spray bottle when the soil feels dry.
– If you see mold, open the lid for a day to let air in.
– Trim any dead leaves and move plants if they outgrow the space.
Next steps? Try different plant blends, switch accents with every season, and keep this tiny garden fresh and fun to tend.
Product Recommendations:
• Clear glass terrarium container
• Miniature decorative figurines
22. DIY Bookmarks
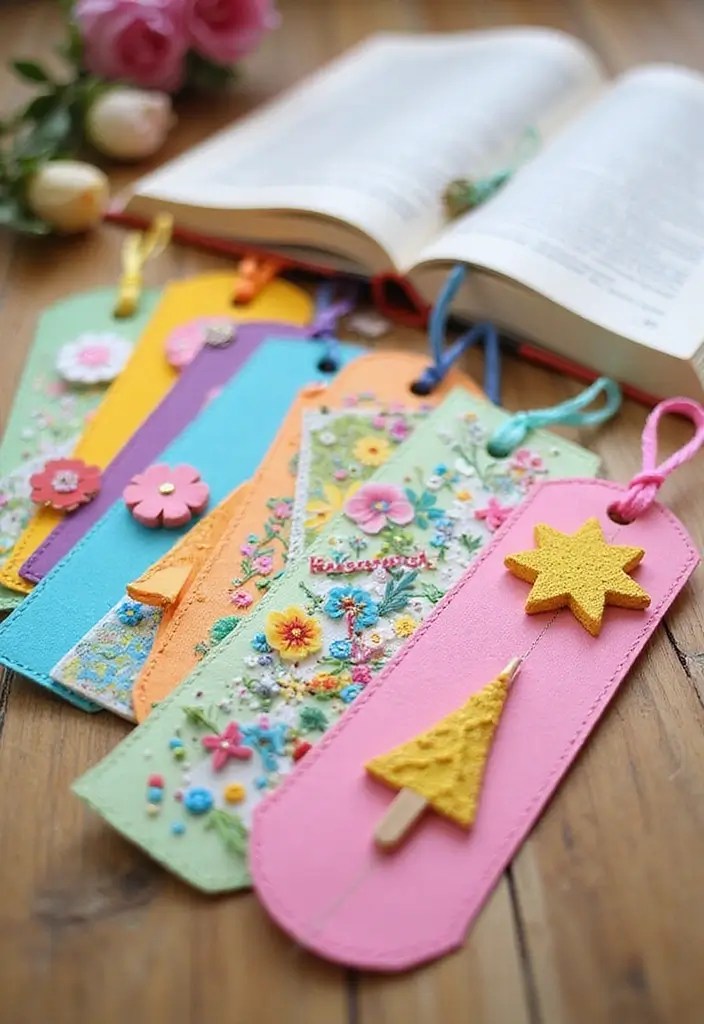
Your child loves books, but it is easy to lose their place with plain bookmarks. DIY bookmarks make reading more fun and give your kid a small win they can be proud of. This project is kid friendly, quick, and the finished pieces brighten any shelf.
What you’ll need
– Cardstock or craft paper
– Scissors and a ruler
– Pencil for marks
– Markers, stickers, or pressed flowers for decoration
– Clear tape or a laminating sheet (optional)
How to make
1) Cut the paper into bookmark strips of a size you like. Short or long, thin or wide, the choice is yours.
2) Let the kids draw, color, or stick decorations. They can write their name or a favorite quote.
3) If you want them to last longer, seal the fronts by laminating or covering with clear tape.
4) Punch a small hole near the top and add a tassel or a bit of yarn for a pop of color.
Tips and ideas
– Try rounded corners for safety and a softer look.
– Create themed sets, like animals, space, or seasons.
– Use these as quick gifts for friends or as party favors.
Next steps: snap a photo of their bookmarks, share them with family, and keep a stack ready for rainy days or library trips.
Product Recommendations:
• Laminating sheets for crafts
23. DIY Coasters

You want to protect your surfaces and add a bit of personal style at the same time. DIY coasters are a perfect fit. They’re quick, affordable, and you can let kids join in. Use cork, wood, ceramic tiles, or even sturdy cardboard to start.
What you’ll use
– Cork discs, wooden chips, or ceramic tiles as bases
– Cardboard as a budget option
– Markers, acrylic paints, or simple stamps
– Paint brushes, sponges, or cotton swabs
– Clear waterproof sealant or varnish
– A clean cloth and a flat workspace
How to create them
– Pick your base material that fits your style and budget
– Let kids decorate the surface with markers or paints
– Allow plenty of time for drying between layers
– Seal the finished coasters with a waterproof finish for longevity
Tips and finish ideas
– Add a soft felt pad underneath to protect tabletops and floors
– Test the seal by wiping with a damp cloth after it dries
– Create a mini coaster set in different colors for a coordinated look
These coasters do more than guard surfaces. They bring a small, personal touch to your kitchen or living room. Easy to make, fun to use, and great for quick gift ideas too.
Product Recommendations:
24. Upcycled Glass Jars

Are you looking for a quick, kid-friendly project that cuts waste and adds charm to your home? Upcycled glass jars fit the bill. They’re cheap, easy, and you can make them your own. Use jars as tiny storage, soft-lit lanterns, or small planters. Your child will see a plain jar turn into something useful and pretty.
What you need
– Clean jars with labels removed
– Safe paints, yarn, stickers, or tape
– A few LED tea lights or battery lights
– Optional: soil and tiny herbs for mini planters
Let’s break it down: steps for upcycling
– Wash and dry each jar thoroughly
– Remove stubborn labels with warm water or a bit of tape
– Let kids decorate the outside: paint a scene, wrap with yarn, or add stickers
– Add light by placing a small LED inside or by wrapping a string light around the jar
– If you want a planter, add a layer of rocks, then soil, and plant a seed or herb
These jars can tidy up shelves and desks. They hold pencils, coins, beads, or bath salts. When lit, they glow softly and set a cozy mood on a table or windowsill. They also teach kids how to repurpose and care for simple things.
Next steps: grab a jar, pull together what you have, and start small. You’ll spot new ideas as you go.
Turn your trash into treasure with upcycled glass jars! They’re not just eco-friendly; they make your space shine with creativity and charm. Get kids involved and watch their imaginations flow!
Product Recommendations:
25. Handmade Greeting Cards
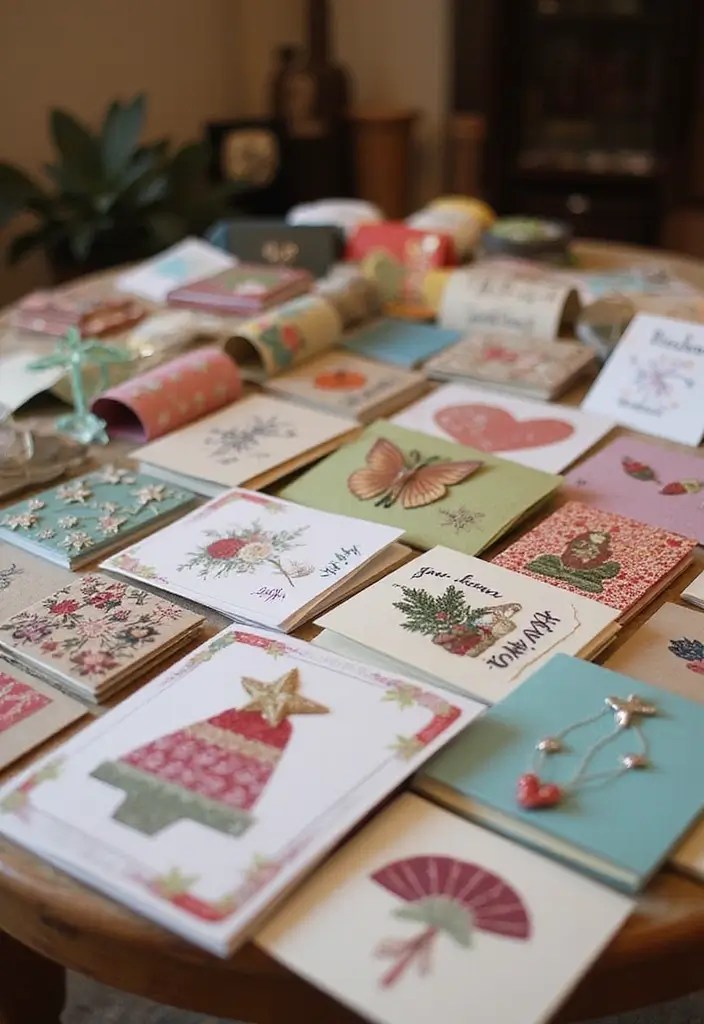
You want a simple craft that brings joy. Handmade greeting cards let you share feelings and spark smiles. They work for any age and any occasion.
Here is why they shine: they cost little, use common supplies, and grow creativity. You can tailor each card to the person who will receive it.
What you’ll need:
– Cardstock or thick paper for the card base
– Regular paper for layered designs
– Scissors, glue, and a marker or pen
– Stickers, stamps, or pressed flowers for decoration
– Optional touches: glitter in a small amount, a ribbon, or a tiny photo
How to make greeting cards:
– Fold a sheet of cardstock in half to create the base
– Let kids draw, write a message, or paste a small collage on the front
– Add extra flair with stickers, stamps, or pressed pieces
– Include a personal line like the recipient’s name or a short note inside
– Let glue dry, then slip the card into an envelope
Why this helps: these cards build patience and planning. Kids learn color choices, layout, and how to write from the heart.
Every card becomes a keepsake when you add a memory or kind thought.
Next steps: plan a mini card-making session, swap cards with a friend, or keep a small file of ideas for later projects.
Product Recommendations:
26. DIY Clipboards
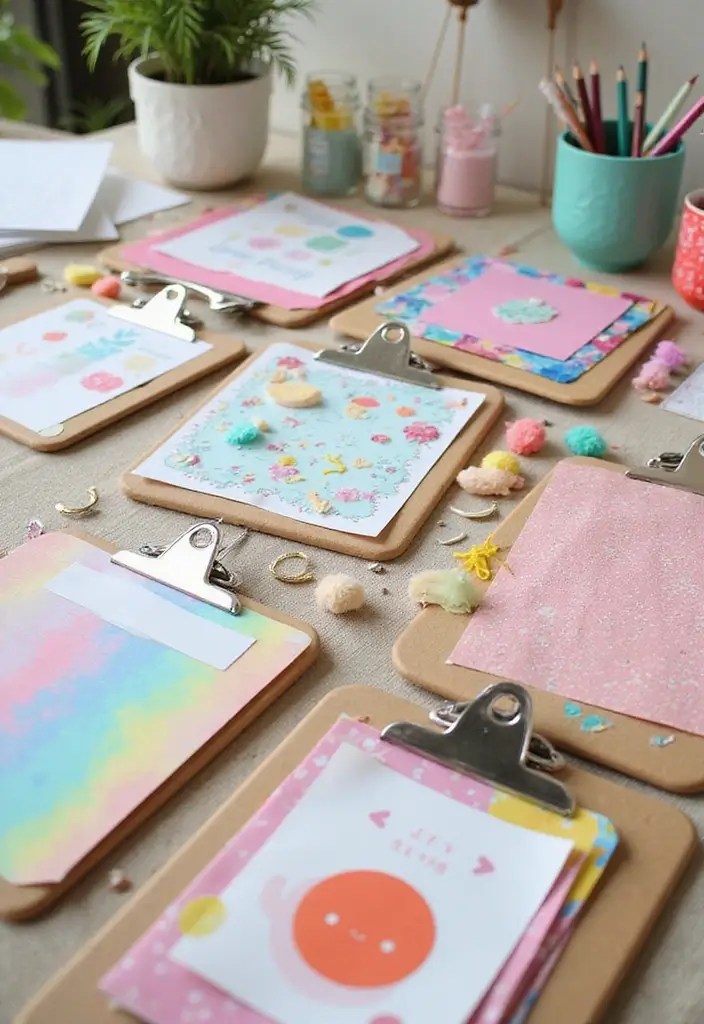
Looking for a quick, affordable project your kids can do themselves? DIY clipboards fit right in. They let a plain desk tool match a kid’s style and make homework feel a little more fun. Best of all, the clipboards stay useful long after the craft day.
Here is why clipboards work
They are simple to customize.
They stay sturdy with a light coat of glue or sealant.
Your child can use them for notes, art, or reading lists.
What you need
– Plain clipboards
– Decorative paper or fabric
– White craft glue or Mod Podge
– Scissors
– Ruler and pencil
– Optional extras: washi tape, stickers, name labels
Instructions for making clipboards:
– Pick a clipboard and cover the front with your decorative paper or fabric.
– Cut the material to fit, leaving a tiny border around the edges.
– Glue it down and press flat. Smooth out any bubbles.
– Let it dry completely, then add extras like washi tape or stickers for flair.
– If you like extra protection, seal with a thin coat of Mod Podge or glue.
How to use your personalized clipboards
They work for school work, art projects, or keeping important notes within reach. Clip sheets of homework, drawings, or reminders. Stand them up on a desk to line up tasks.
Care and quick fixes
Wipe with a damp cloth after art projects. If the surface peels, re-glue the edge and press flat again. Store in a dry spot to avoid damp glue stains.
Next steps
Show your kids how to pick a theme for each clipboard. Try different fabrics, colors, or patterns. You’ll get a dozen unique tools that spark pride and tidy spaces.
Product Recommendations:
27. DIY Flower Crowns

Want a quick craft you can do with kids that looks fancy? DIY flower crowns are colorful, simple, and ready in minutes.
Here is why this project works for kids. It builds patience, improves small motor skills, and yields a proud, handmade accessory.
What you need
– Gather floral wire, tape, scissors, and a small bundle of flowers, artificial or fresh.
– Have a ribbon or string to tie the crown if you want a secure fit.
Steps
– Measure the head and cut a piece of wire to fit, with a little extra to form a loop.
– Trim each flower stem short and remove the leaves from the lower part so they sit neatly on the wire.
– Start in the center. Tape a flower to the wire and add more on each side in a simple pattern.
– Keep taping and bending until the crown feels snug and looks full. Tie the ends together and wrap with tape to finish.
Tips
– Use artificial flowers for a mess-free crown that lasts.
– Let kids pick colors. Bright pinks, sunlit yellows, or soft purples create a cheerful look.
– If the wire feels sharp, adults should help bend it into a smooth curve and cover rough edges with tape.
– Store the crown flat when not in use to keep flowers from bending.
Next steps: wear the crown at a pretend party or a sunny day playtime. It’s a cute DIY accessory for dress-up and photos.
Product Recommendations:
28. DIY Stamped Fabric Bags
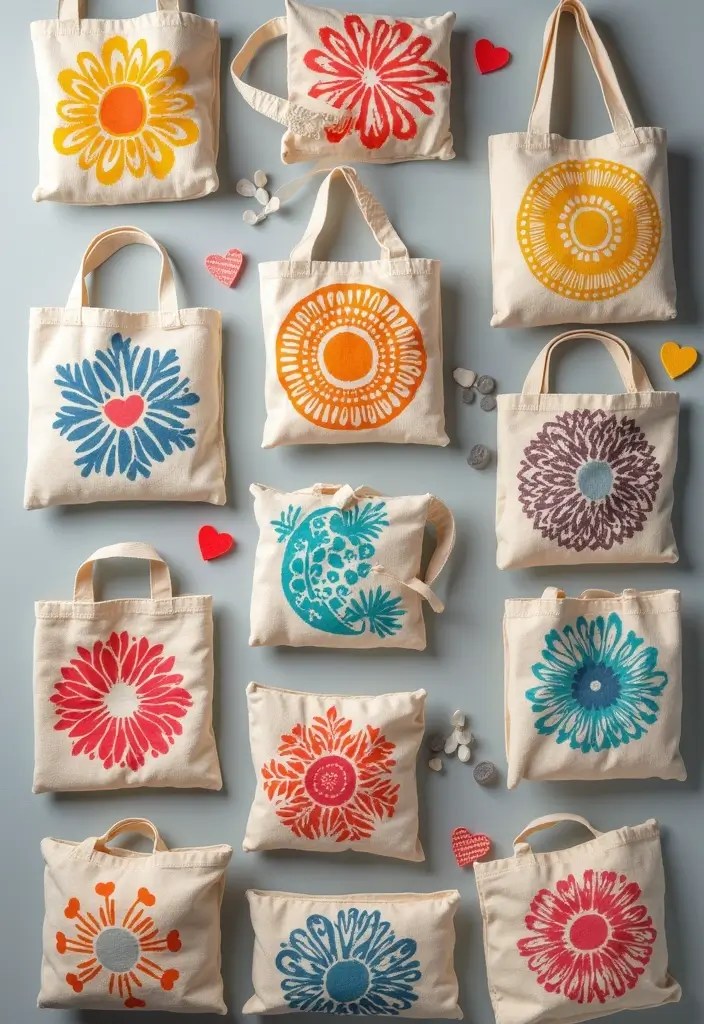
Want a simple craft that yields something useful? These stamped fabric bags let kids paint with stamps and end with a bag they can use or gift.
What you need
– Plain fabric bags
– Fabric paint in bright colors
– Stamps or DIY stamps from sponges, potatoes, or foam shapes
– Cardboard or old newsprint to protect the table
– Optional: a warm iron to set the paint
Step by step
1) Set up a flat workspace. Place cardboard inside the bag so ink does not bleed through.
2) Let kids pick colors and stamps. They can make a repeating pattern or a single big design.
3) Coat the stamp with paint and press firmly onto the bag. Lift straight up for a clean print.
4) Add more stamps and colors as you like. Keep designs lively and not crowded.
5) Set the paint. Let the bag dry completely. If the label says so, press with a warm iron to fix the design.
Tips for best results
– Use fabric paint and air-dry for best protection.
– Test a small spot first to see how colors sit on the fabric.
– Wash the bag separately the first few times.
The payoff
Your child gains pride in a handmade bag and you get a useful item for gifts or treasure trips.
Product Recommendations:
29. DIY Nature Prints

Want art you can make with kids that adds a touch of the outdoors to your home? DIY nature prints do just that. They’re simple, colorful, and quick to finish. You get pretty pictures without long steps or messy setups. Here is why this works: the process uses everyday supplies and the natural shapes you find outside.
Next steps start with your supplies. Gather leaves, flowers, small twigs, and a clean sheet of paper. Have a few colors of acrylic paint or ink ready, plus a rolling pin or another smooth, flat object to press with.
Steps to create nature prints:
– Collect flat, sturdy natural items like leaves, petals, or seed pods, plus a blank sheet of sturdy paper.
– If the items are damp, pat them dry. Dry surfaces press better and keep colors bright.
– Add a thin layer of paint to the back of the leaves or to the paper, whichever you prefer.
– Place the items on the paper, then cover with a clean sheet. Press firmly with a rolling pin to transfer color and shape.
– Lift the top sheet and peel away the items to reveal the print. Let it dry.
– Frame the prints or turn them into handmade cards and gift tags.
These nature prints make cozy wall art and great, inexpensive gifts. Use seasonal colors to reflect the time of year, or mix shapes for a playful collage. Quick, personal, and ready to display.
Product Recommendations:
30. DIY Memory Jars

DIY memory jars give kids a simple way to hold onto the good times. They turn small moments into a story you can see and touch.
What you need
– Empty jars with lids
– Paints, stickers, ribbons, and other decorations
– Paper slips or tiny keepsakes to go inside
How to create memory jars
– Wash the jars so they are clean and ready for decorating
– Let your kids pick colors and designs. They should choose what they love
– Have them decorate the outside with paint, stickers, or a ribbon around the lid
– Talk about what goes inside. A note or memento should stand for one memory you want to remember
Ways to use memory jars
– Fill jars with little notes about happy moments, tickets from a day out, or small trinkets from trips
– Use one jar per month or one jar for each child
– When you feel down, open a jar and read the notes aloud to lift the mood
– Place the jars on a shelf where everyone can see them
Next steps
Keep it simple. Place the jars on a shelf where everyone can see them. Add a memory each week to keep the habit going.
If you want, add a photo slot on the lid or a small drawer for keepsakes. With time, the jars grow with your memories. Keep it light and fun.
Product Recommendations:
Conclusion
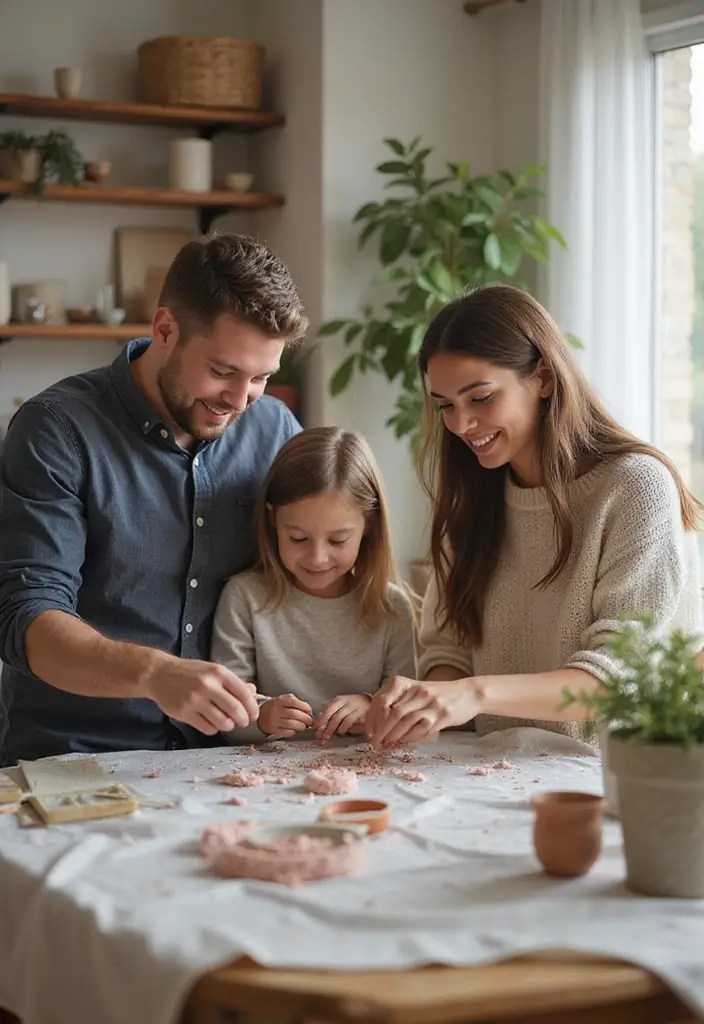
These 30 DIY home decor projects are not just enjoyable; they also create opportunities for family bonding and creativity. Whether you choose to make flower pots or memory jars, each project allows kids to express themselves and learn valuable skills.
Involve them in your home decor journey and watch your spaces come alive with their creativity and imagination. The joy these projects bring can last a lifetime, enriching both your home and family experiences!
Frequently Asked Questions
What Are Some Easy DIY Home Decor Projects Suitable for Kids?
If you’re looking for easy DIY home decor projects that kids can enjoy, you’re in for a treat! Projects like painted mason jar vases and craft stick wall art are perfect for little hands. They are not only simple but also allow kids to express their creativity while brightening up your home.
These projects are designed to be quick, affordable, and require minimal supervision, making them ideal for family bonding.
How Can I Make DIY Home Decor Projects Affordable?
Making DIY home decor doesn’t have to break the bank! You can keep costs down by using recycled materials like old cardboard, fabric scraps, or upcycled glass jars. Many projects utilize items you already have at home, such as turning old t-shirts into decorative pillows or using leftover paint for colorful wall hangings.
Being resourceful not only saves money but also adds a personal touch to your decor!
Are There Any Safety Tips for Doing DIY Projects with Kids?
Absolutely! Safety is key when engaging in DIY projects with kids. Always supervise them closely, especially when using tools like scissors or craft knives. Make sure to use kid-safe materials and non-toxic paints or glues. It’s also wise to create a designated crafting space to keep the mess contained and ensure a fun, safe environment for creativity to flourish. Remember, fostering a safe space allows kids to express themselves without worry!
How Do DIY Projects Enhance Family Bonding?
DIY projects are a fantastic way to enhance family bonding! When you create together, you foster communication and teamwork. Projects like DIY photo frames or memory jars not only spark creativity but also encourage shared experiences and storytelling.
Working on a project as a family helps build lasting memories and strengthens relationships, all while transforming your living space into something uniquely yours!
What Are Some Quick DIY Home Decor Ideas for Busy Families?
For busy families, quick DIY home decor projects are a lifesaver! Consider making glittery flower pots or paper plate wall hangings, which can be completed in under an hour. These projects are not only easy but also provide instant gratification and a sense of accomplishment. Plus, they can be done with minimal cleanup, allowing you to enjoy the results without the hassle!
Related Topics
DIY home decor
kid-friendly crafts
easy projects
affordable decor
family activities
upcycled materials
quick DIY
colorful decor
seasonal crafts
creative bonding
simple art
budget friendly


Leave a comment